Oversikt
I denne guiden:
For å se en interaktiv gjennomgang, klikk her.
Organisasjon
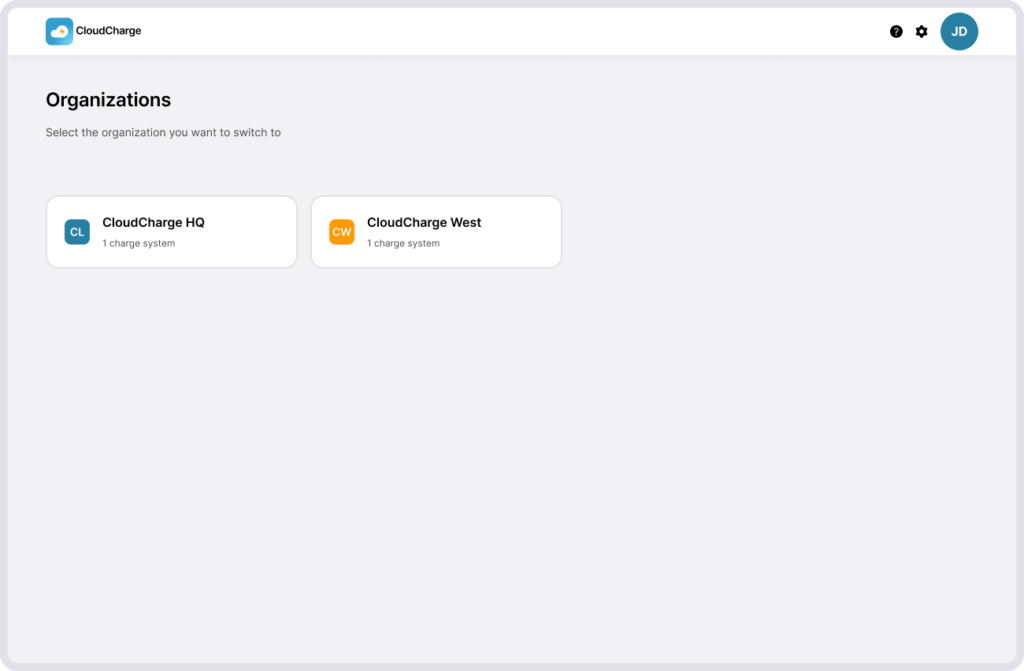
En organisasjon eier ladestasjonene og er en kunde av CloudCharge. Organisasjonen består av ladesystemer som er fasiliteter utstyrt med ladere.
I CloudCharge-portalen kan du være administrator for flere organisasjoner. Når du logger inn, velger du en organisasjon. Du kan bytte mellom organisasjoner senere ved å bruke menyen øverst til høyre.
Ladesystem
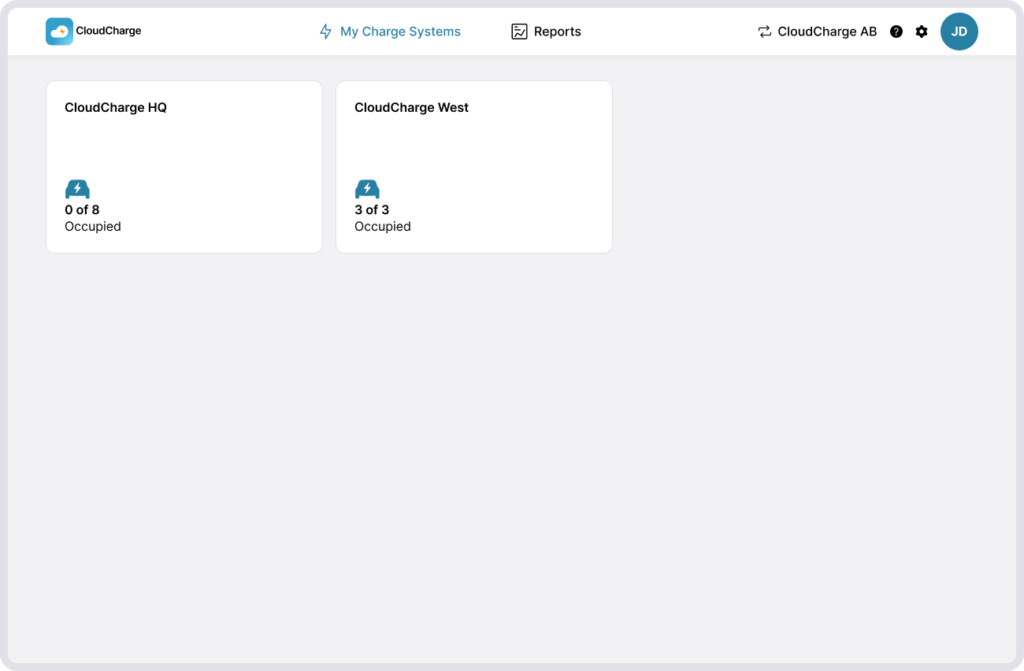
Et ladesystem er en fasilitet utstyrt med ladere. Du kan ha flere ladesystemer innenfor en organisasjon. Laderne i et ladesystem befinner seg i samme område og vil bli administrert som en enhet. Hvis du administrerer flere ladesystemer, vil du se en oversiktsside. Hvis du bare har ett ladesystem, åpnes det umiddelbart etter at du har valgt organisasjonen din. Du kan bytte mellom ladesystemer ved å klikke på Mine ladesystemer i toppnavigasjonen. Les mer om ladesystemer.
For å endre ladesysteminnstillingene, klikk på tannhjul-ikonet. Her kan du:
- Se og endre systemets detaljer
- Se oversikt over administratorer som mottar varsler når noe skjer med laderne. Les mer om administrering av administratorer og varsler.
- Endre hvilke brukere som har tilgang og invitere nye brukere til ditt ladesystem. Hvis du ikke har noen inviterte brukere, for eksempel hvis alle får tilgang til laderne ved hjelp av en lokal besøks-RFID-brikke, vil denne listen være tom. Les mer om administrering av brukere.
- Endre hvilke besøks-RFID-brikker som har tilgang. Les mer om besøks-RFID-nøkler.
Ladergrupper
Innenfor et ladesystem finner du alle laderne dine organisert i én eller flere ladergrupper, hver med ulike innstillinger eller distinkte posisjoner på kartet, men som fortsatt er i samme område. For eksempel kan du ha en gruppe ladere som kun er for medlemmer, mens en annen gruppe er åpen for allmen bruk. Les mer om ladergrupper.
For å endre gruppeinnstillingene, klikk på innstillingsikonet ved siden av ladergruppen. Innstillingene inkluderer:
- Endre gruppenavn
- Justere tilgjengelighet mellom privat, offentlig eller begge.
- Sette ladeavgifter. Les mer om ladeavgifter.
Tips: Sørg for at hver gruppe har et beskrivende navn, som for eksempel «Parkering». Dette gruppenavnet, sammen med navnet på ladesystemet, er det brukerne vil se i appen, for eksempel CloudCharge HQ – Ansattparkering.
Offentlig og privat
Grupper kan være:
- Kun privat – Laderne er kun tilgjengelige for brukere du har invitert eller brukere med en RFID-brikke.
- Kun offentlig – Laderne er tilgjengelige for alle med fysisk tilgang til laderne.
- Privat og offentlig – Laderne er tilgjengelige både for private og allmenne brukere, men pris og tilgjengelighet kan variere mellom de to.
- Verken privat eller offentlig – Laderne kan ikke brukes.
For å justere innstillinger for inviterte brukere eller RFID-nøkkelinnehavere, naviger til de private innstillingene. For alle andre brukere, naviger til de offentlige innstillingene.

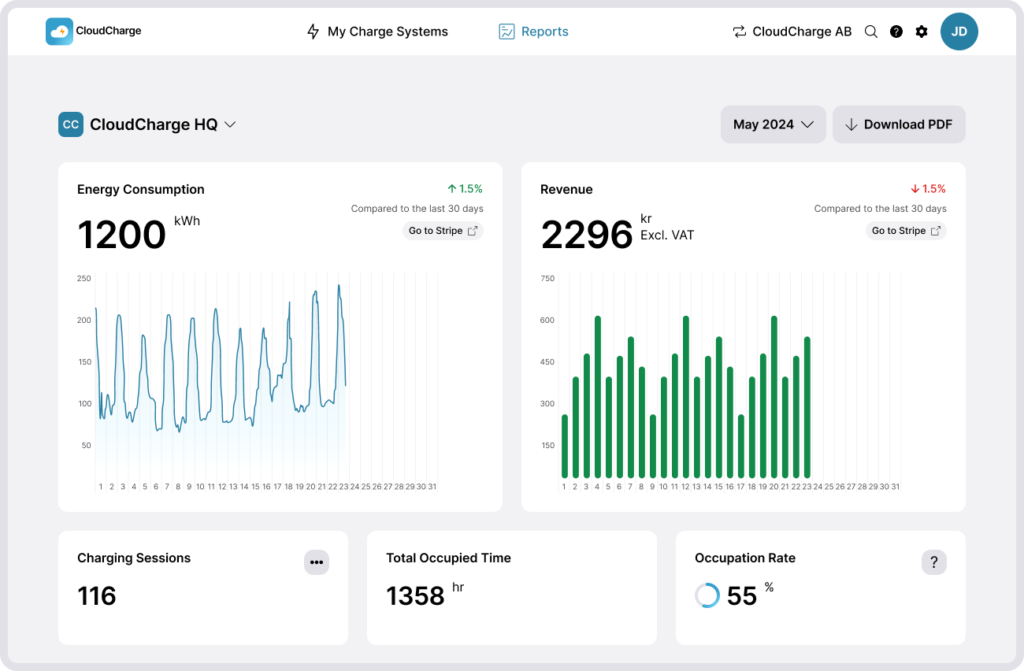
Rapporter
For hvert ladesystem kan du se en rapport. Her kan du få en oversikt og detaljerte innsikter i hvordan laderne dine brukes og inntektene generert fra brukere som betaler for EV-lading. Les mer om rapporter.