Charger Groups
Within a charge system, you’ll find all your chargers organized into one or more Charger Groups, each potentially configured with different settings, or with distinct positions on the map but still in the same neighborhood. For instance, you might have one group of chargers exclusively for members, while another group is open to the public.
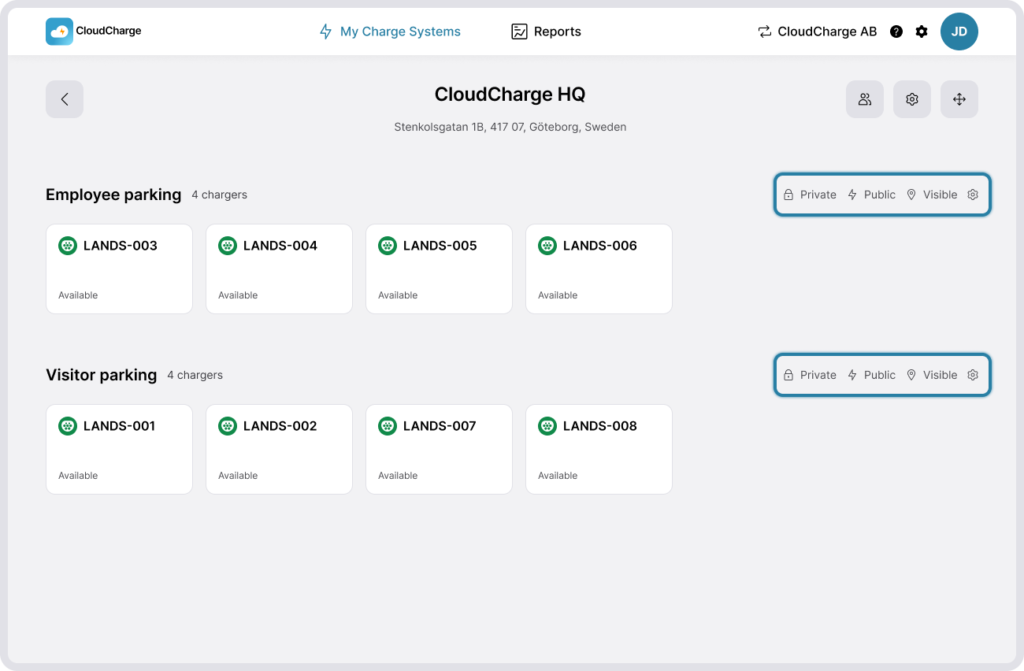
Charger Group settings
Settings you can configure for each Charger Group include:
- Modifying the group name
- Adjusting availability between private, public or both.
- Setting charging fees. Read more about Charging fees
Charger Groups can be:
- Private only – Chargers are only available to users you’ve invited, or users with an RFID Key.
- Public only – Chargers are available to anyone with physical access to the chargers.
- Private and Public – Chargers are available to both Private and Public users, but pricing and availability may differ between the two.
- Neither Private nor Public – Chargers cannot be used.
1. Modify settings
To modify Charger Group settings, click on the settings icon next to each group. If you’ve public and/or private activated, you can click directly on those icons instead.
Create a new Charger Group
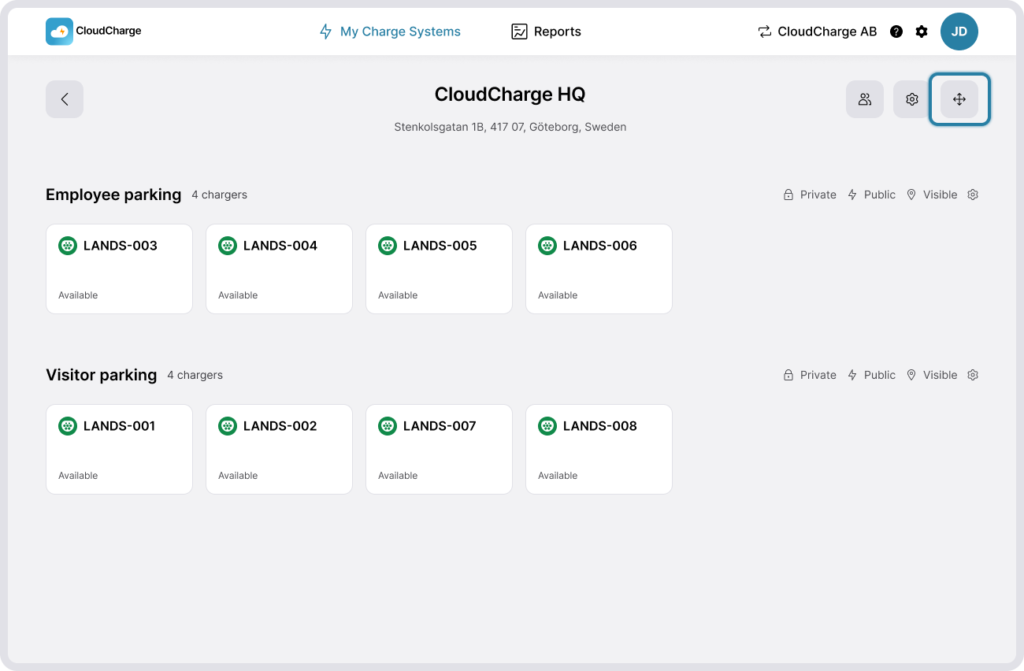
1. Navigate to the rearrange page
Click on the rearrange icon in the upper right corner.
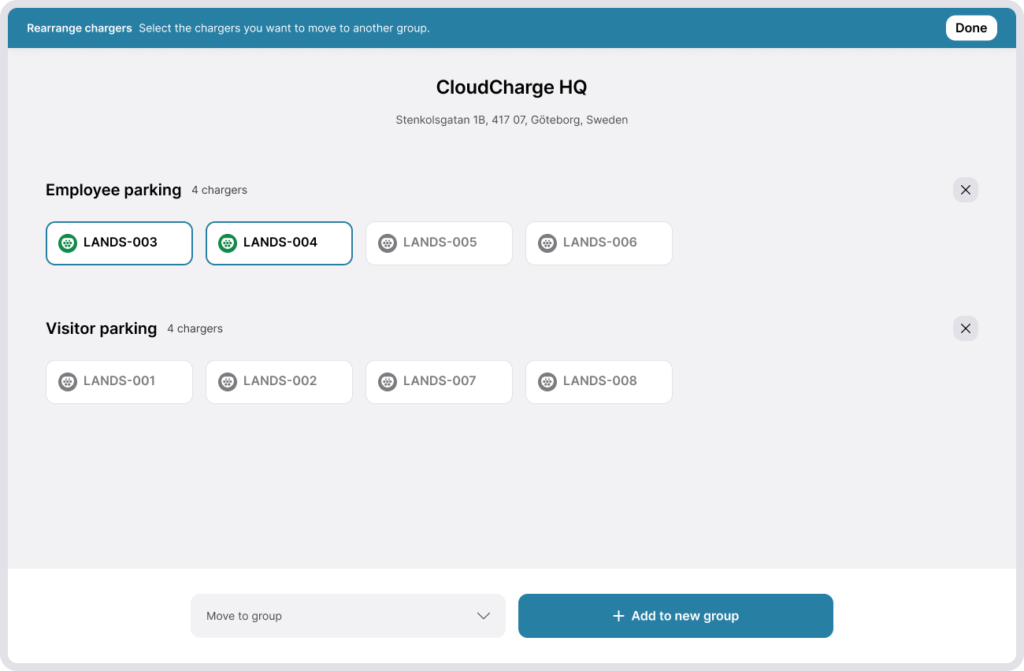
2. Select relevant chargers
Select all chargers you want to move to a new Charger Group and click “Add to new group”.
3. Give the group a name
It’s important that each Charge Group has a descriptive name, such as “Parking”. This group name, along with the Charge System name is what the users will see in their app, for example CloudCharge HQ – Employee Parking.
4. Modify settings
To modify the group settings, click the settings icon next to the Charger Group. To adjust settings for invited users or RFID Key holders navigate to the private settings. For all other users, navigate to the public settings.
Move chargers between Charger Groups
Move a charger to another Charger Group if you want the charger to have the same charging price or availability as the other chargers in the other group.
1. Navigate to the rearrange page
Click on the rearrange icon in the upper right corner.
2. Select relevant chargers
Select all chargers you want to move to a new Charger Group and click “Move to group”.
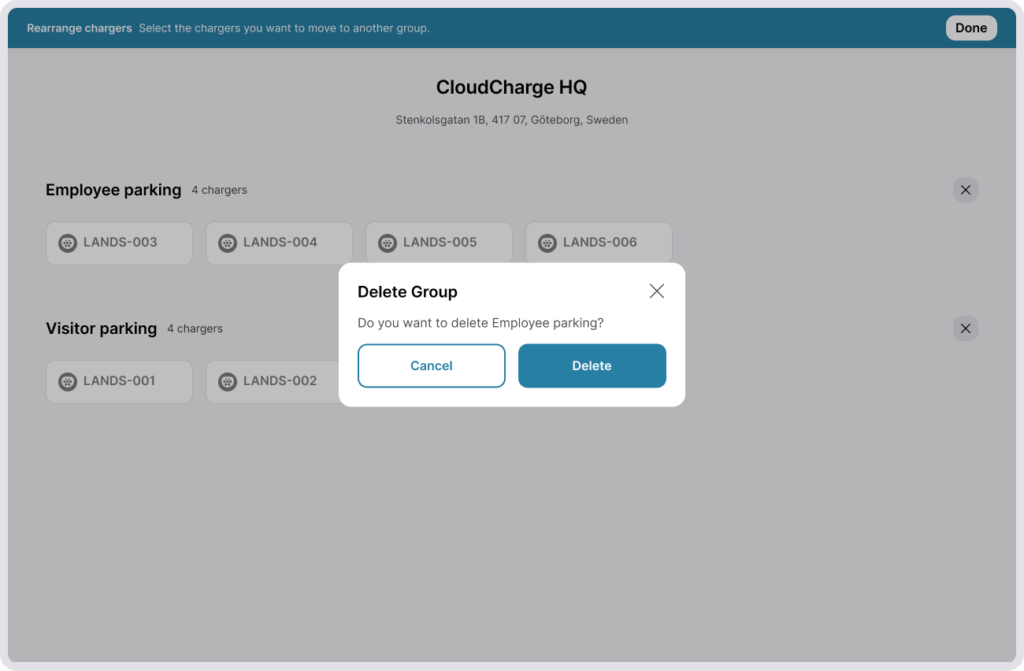
Delete a Charger Group
If a group is without any chargers, it’ll continue to exist until you remove it manually.
1. Navigate to the rearrange page
Click on the rearrange icon in the upper right corner.
2. Click the X icon
Click the icon with an X next to the group you want to remove. If there are any chargers in that group, you’ll be prompted to move them to an existing group.